If you’re in the market for www invisalign doctor, this is your chance to get it at an unbeatable price from the website of one of the best orthodontists in New York City! That’s right! By clicking here, you can buy Invisalign directly from Dr.
Step 1: Register On Our Site
The first step is simply registering on our site. Just fill out a form, and then you’ll be able to log in, review your treatment plan, pay your invisalign fee payment or book an appointment. You can also opt-in for our bi-monthly email newsletter where we share tips and tricks from dentists around Australia. It’s a great way to stay up-to-date with any industry news you might have missed! And don’t worry: if you decide not to opt in for email updates, we won’t bombard you with them; we only send out emails when it really matters (like reminding patients of their next appointment). In addition to that, once you register on our site, you’ll get access to My Account. This feature lets you see all of your appointments—past and future—as well as how much money is left over from your initial invisalign cost payment. If there are any issues with payments or appointments, just contact us and we’ll help fix it right away! Also make sure to check out our www invisalign doctor price calculator so that you know exactly how much money will be taken off your final bill.
Step 2: Go To The Patient Dashboard
When you first login, you’ll be prompted to fill out some basic contact information in order to create your patient profile. Once you’ve filled in all of your information, click Save & Continue. You’ll then be directed to a page that has step-by-step instructions on how to complete your treatment. Read through it carefully and then click Continue. The next page will instruct you on how to add photos and video so that we can evaluate your progress from start-to-finish throughout treatment. This is very important because it helps us determine whether or not www invisalign doctor can achieve an improvement in your smile. Take note of what’s asked for because some things (like close-up photos) are required for treatment approval! Once you’ve added all of your photos and videos, click Continue. On the next page, review your personal information and make sure everything looks correct before clicking Submit Your Information. We’ll review your submission as soon as possible and reach out with any questions if necessary. If everything looks good, congratulations—you’re ready to begin treatment!
Step 3: Enter Your Information Into The IDENTIFY MY CASE Form
Once you’ve entered your information into identify my case, click on next. You’ll be directed to answer a few other questions about your dental records and then click on submit. Your site will then calculate if you are eligible for treatment. If eligible, you will receive a printable voucher that you can bring with you into your next visit! If not eligible, a generic smile design of what teeth look like when patients are ready for treatment will be given so that they can create a treatment plan with their dentist or orthodontist.
Step 4: Upload Your Before Picture
Before you can use our site, you’ll need a recent photo of yourself with both teeth and lips closed. It doesn’t matter if it’s in color or black and white, but make sure it’s sharp. Don’t forget to smile! You can either upload your picture below or email it as an attachment here: [email protected] Once we have received your picture, your account will be activated in less than 24 hours. If you don’t receive a response within 48 hours please send us another email: [email protected] If you haven’t heard from us again within 72 hours feel free to give us a call at or visit one of our offices. (For more information on what to expect during registration check out our FAQ page.) Note: Pictures that are too blurry or contain reflections (from glasses) will not be accepted. Step 5: Select a payment plan : Please note that when choosing a payment plan, prices listed are only valid for first time patients and may vary based on previous treatment performed by Dr Epstein or other orthodontists affiliated with his practice.
Step 5: Get A Custom Treatment Plan
Login to your www invisalign doctor account. On each page of your treatment plan, there is a link that takes you back to your home page. To get more information, click on more. From here, you can learn about specific issues that may be causing teeth shifting and how many sessions will be required for your custom plan. You should also contact your dentist about possible questions regarding costs or insurance reimbursement for braces vs invisalign cost . For some patients with cost constraints, this might provide helpful insight. We offer free consultations with our certified specialist if you want more information before getting braces vs invisalign cost . Each patient’s situation is different and has different needs.
Step 6: Download My Product List
This downloadable spreadsheet is a checklist of all my products, including pricing and descriptions. It’s your quickest way to find what you need quickly. Don’t worry about copying any text from it; simply save it on your computer so you can quickly access it when needed. That will prevent you from forgetting any important information or prices! If you want an easy copy-and-paste format, use that as well. I don’t mind either way—as long as you end up with everything in one place. Either method works great for me! Step 7: Fill Out My Simple Questionnaire: Now that you have everything set up, go ahead and fill out my simple questionnaire (see link below).
If there are any questions that don’t apply to your business, feel free to leave them blank or delete them entirely. I’ve tried hard to make sure that every question has some relevance for everyone reading it, but if something doesn’t apply to you then there’s no reason for us both to waste time filling out fields where we’re going to hit delete anyway! Once you’ve filled out the form, click Save & Continue at the bottom of each page. Then, click Payment at left side of screen. When done making payment, click Submit Payment button. You will be directed to a thank you page and receive an email receipt once payment is processed. Your order should be completed within 24 hours after receipt of payment depending on workload/availability etc.. Once complete please send me an email so I know how many orders I should expect in total along with details such as title(s), author(s) name(s), word count (if applicable) etc..
I look forward to working with you soon!
Step 7 : Enjoy An Easy Shopping Experience.
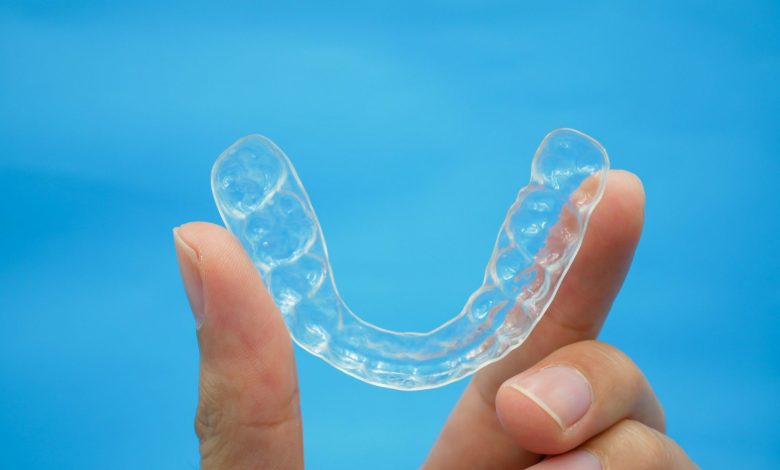
At my practice, I offer customized treatment plans using a state-of-the-art computer system. The software takes digital impressions of your teeth and performs a three-dimensional analysis, suggesting an optimized treatment plan. You will be asked to complete some information during your appointment. Your privacy is important and we take all precautions necessary to protect any sensitive data you provide us with. Once your new aligners are made, they will be shipped directly to you. Usually it only takes two weeks for your new aligners to arrive at your door! : At my practice, I offer customized treatment plans using a state-of-the-art computer system. The software takes digital impressions of your teeth and performs a three-dimensional analysis, suggesting an optimized treatment plan. You will be asked to complete some information during your appointment. Your privacy is important and we take all precautions necessary to protect any sensitive data you provide us with. Once your new aligners are made, they will be shipped directly to you. Usually it only takes two weeks for your new aligners to arrive at your door!