What Is Roof Flashing And What’s Its Purpose?
Roof flashing is a material made up of thin metal which roofers install on roofs. The main purpose of roof flashing is to direct water away from certain areas and parts of your roof and building as well. Such as walls, chimneys, and roof valleys, etc. composition wise there are different types of roof flashings however, flashings made up of aluminum, steel, or copper are the most common ones. Steel is used to make flashings more than any other metal. There are two reasons for that. One is this metal gives an attractive clean look and the other is more affordable as compared to other metals. Although copper has more life than steel the cost of copper is also high.
Some Other Objectives Of Roof Flashing:
Roof flashing is primarily done to make sure that there is no water leakage in the roof. Roof installation service in Brooklyn New York recommends roof flashing as a critical thing to avoid any damage in the future and because it holds the roof in its shape. Flashing is not a permanent thing; it has to be changed several times throughout the life of the roof. Before we get to know how to install roof flashing, we need to know about the types of it.
Types Of Roof Flashing:
Base Flashing:
At the points where the roof meets any vertical edge such as dormer or chimney at such points, we need to install two flashings. One on the bottom and the other against the vertical surface. This is done to stop the rainwater no matter from which direction it’s coming from. Installing base flashing the rainwater always hits the flashing and went down and away from the joint where the roof and vertical surface meets.
Continuous Flashing:
This type of flashing is done in the shape of a long piece of metal. This piece of metal will cover a large joint such as the point at which the roof gets joined with an entire wall of siding so that has to run along the length of that part of the house. This type of flashing is also called an apron flashing because it kind of acts like an apron for your roof to keep the respective section safe from penetration of water. There are issues of breakage and bending in continuous flashing because metals get expansion and contraction in certain weather. To avoid these expansion joints are built till those long pieces of metal flashing. By doing this, chances of breakage and bending in flashing become less.
Counter Flashing:
It’s a second layer or secondary flashing which is done on the base flashing. It’s done to complete the dual flashing components where needed. Like base flashing it’s also installed just on the vertical surface of the joint.
Drip Edges Flashing:
This type of flashing is a thin metal flashing that is installed on every edge of your roof to keep the water flowing away from your roof to keep it safe from water damage.
Kickout Type Flashing:
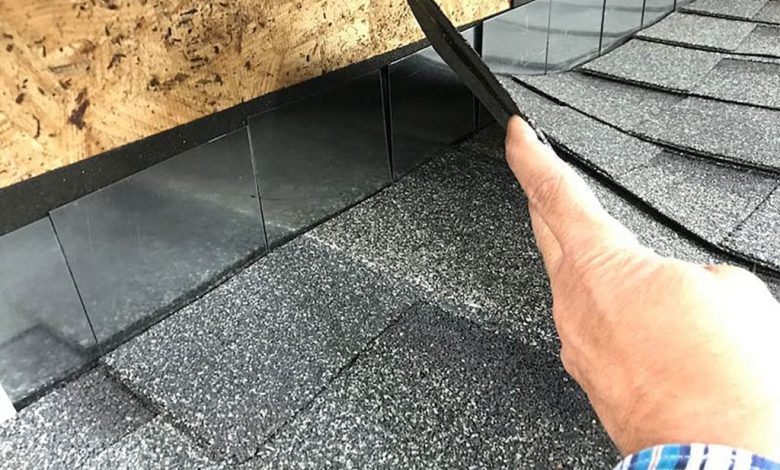
It’s placed at the ending of step flashing or continuous flashing to guide the water to where it meets the gutter. Kickout flashing looks like an L-shaped scoop and it helps to end the step flashing and guide the water away from the walls and don’t let it run along the side of the house or down the shingles.
Skylight Flashing:
As the name indicates it’s related to skylights. Nowadays roofs do have skylights or skylights and these need to be prevented from water. Skylight flashing is done around the edges to stop the water from leaking down into your skylights. Although skylights do come with their flashing like a window if that’s not the case roofers do have to install their own to ensure the safety of lights.
Buy Service: skylights brisbane north
Step Flashing:
Step flashing is done at the area where the roof meets a wall, it’s more or less identical to continuous flashing. However, step flashing is done in a rectangular shape just to descend the roof. These are critical to providing a safety net along any wall which is meeting the roof. So, the situation may be on the third story or dormer window it requires step flashing.
How To Install Roof Flashing:
This method is specific for the installation of a kick out and steps type flashing:
Step 1:
First of all, install your underlayment under the shingles. These shingles need to overlay your step flashing. So, if shingles are installed already then, they need to be removed to install the flashing.
Step 2:
Start by installing the kick-out flashing and proceed upwards. Place the kick-out flashing at the base of the roof and adhere it to the wall by using roof cement.
Step 3:
Put your first shingles in such a way that it sits on your starter strip and the kick-out flashing. Secure it with roofing cement and nails.
To achieve a seamless look, place the nails high up on the shingles so that they get covered by the next step flashing piece. Rubber roofing is less vulnerable to leakage etc. as compared to a conventional roof.
Step 4:
Install the shingles over the kick-out flashing and your first step of installing the flashing is completed. Cover the seams as much as possible with your shingles to get a seamless outlook. Continue in the same fashion until you reach the peak of the roof.
Step 5:
Cut the flashing and shingles perfectly to fit the peak of the roof. These should be bent on the peak to create a curved application and it will keep the joint nice and water-free. Installation of flashing against the chimneys, vents plumbing boots, and other roofing structures can be even more challenging. It can be done perfectly only by professionals.


